Showing posts with label cooking. Show all posts

Monday, March 11, 2013

Garlic Powder


We recently bought a dehydrator; which is going to make preserving herbs, fruits, peppers, etc. so much easier!  I had previously be using my oven at a low setting for hours, which I’m sure used a lot more energy than a dehydrator. 
Since we don’t have much in the garden ripe for preserving right now, I decided to make garlic powder for my first project.  I love garlic powder, but I just can’t bring myself to buy that preservative filled powder at the grocery store. 
 
 
I used 5 heads of garlic.  Unwrapped all the cloves, sliced them up and dehydrated them at 105° F for around 24 hours.  Next time I will slice the garlic thinner to speed it up.
I ground the brittle cloves up in a blender, strained out the big clumps and reground them until I had nice smooth powder.    
 
My 5 heads of garlic filled up a half pint mason jar.
 
It tastes amazing, the house smells wonderful and I can’t stop putting it on everything!  Pasta, pizza, calzones, veggies, eggs, salads, breads.  We are going to put this dehydrator to very good use!

Monday, March 4, 2013

Homemade Spinach and Mushroom Ravioli

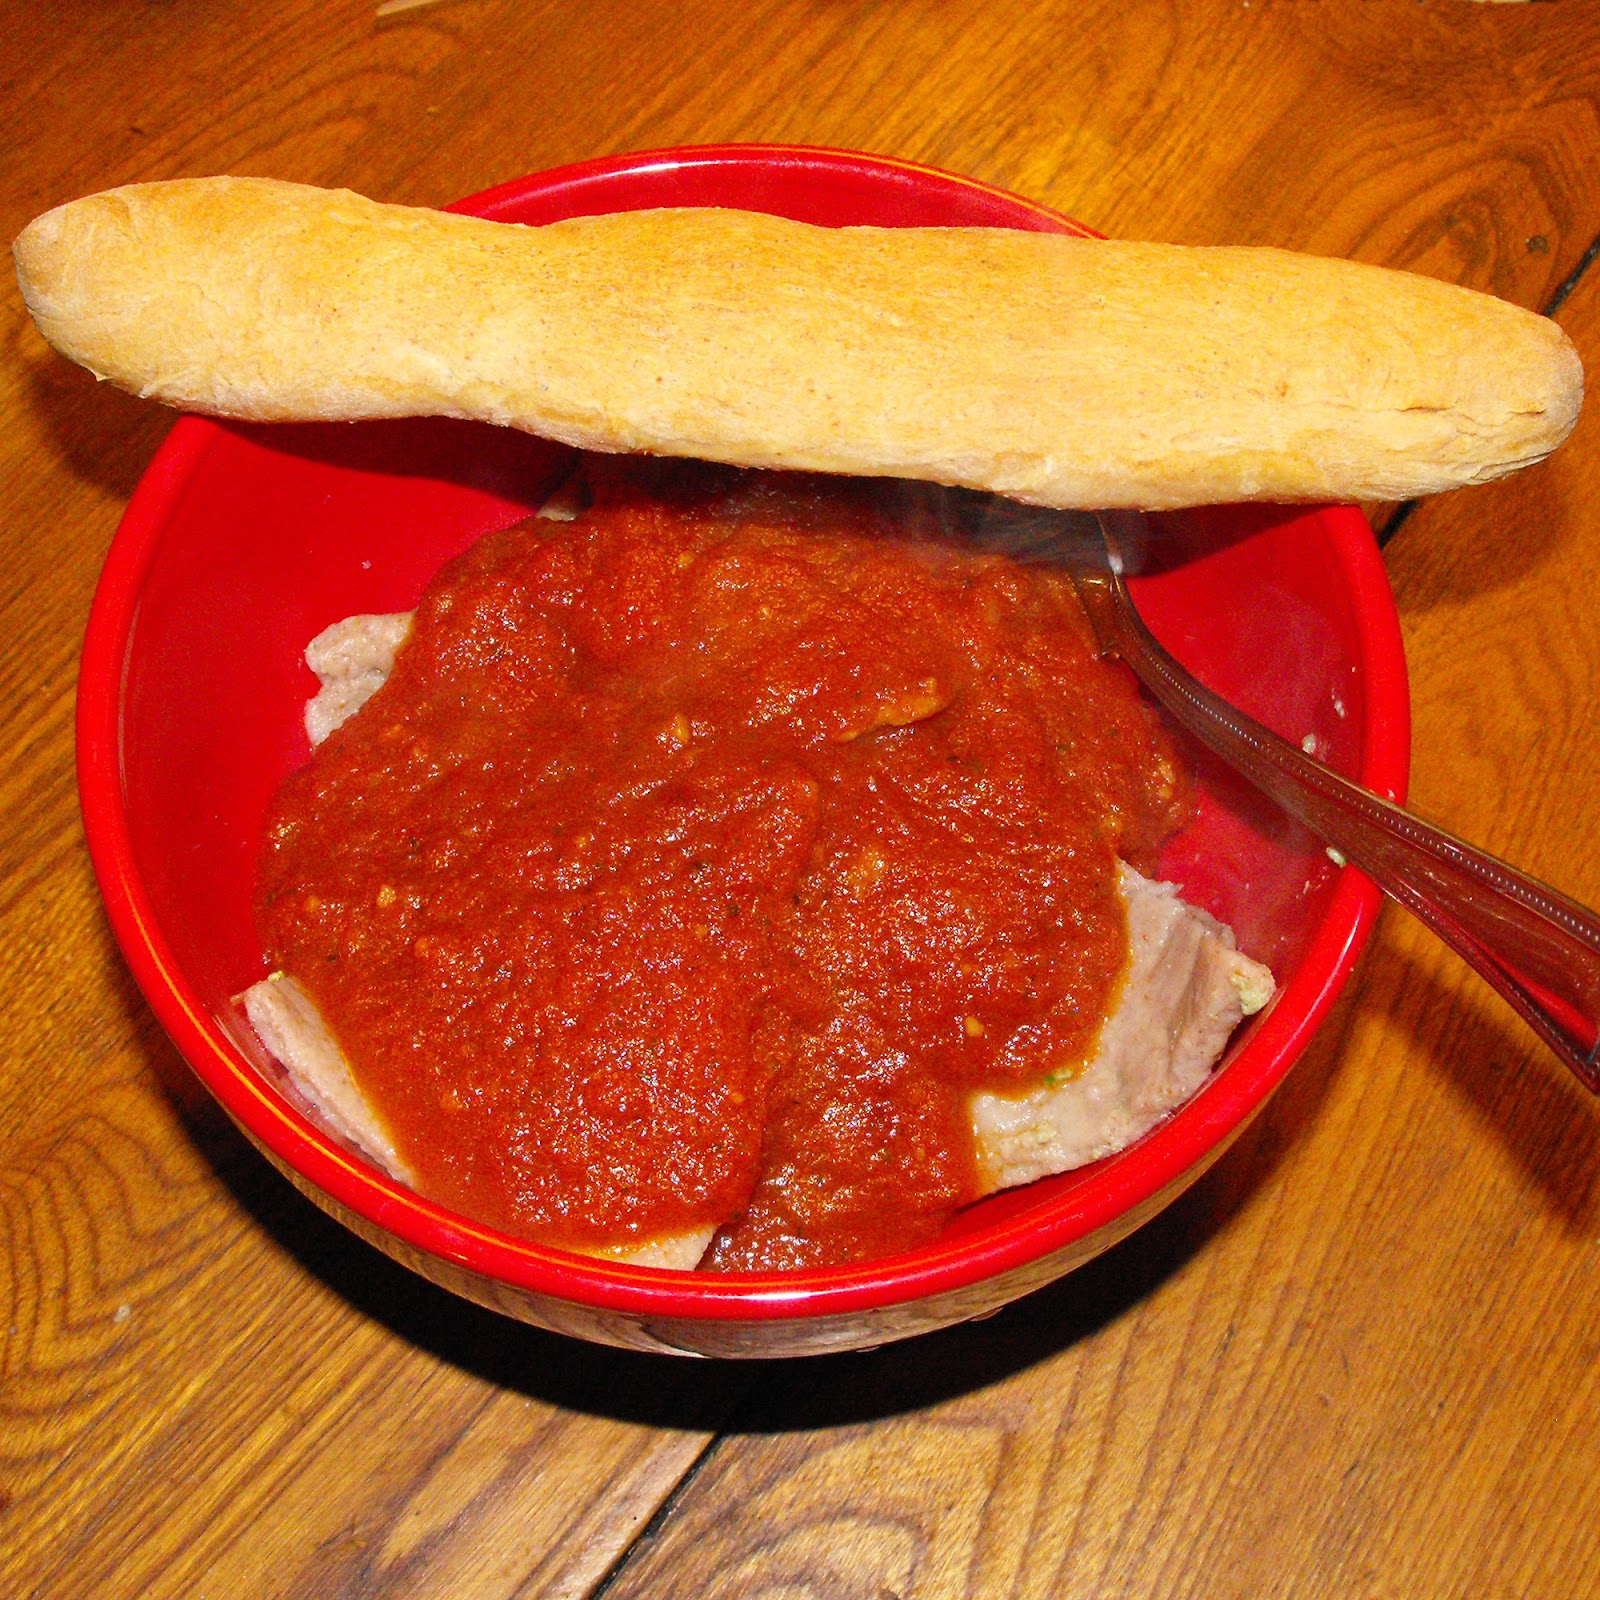
Well I think this is the hardest I’ve ever worked for a meal.  My boyfriend and I were sweating by the time we finished hand rolling our pasta; we are definitely ready to invest in a pasta roller!  We also made a fresh batch of pasta sauce and baked bread sticks, but the ravioli was the real accomplishment.


FILLING:

Blend:

1 CUP chopped mushrooms and spinach (substitute or add any veggies / herbs you like)
1 CUP ricotta cheese
2 eggs

Store in refrigerator until ready to use

PASTA:

Mix:

2 CUPS whole wheat flour (or other grains)
3 eggs
Pinch of salt
Knead dough for 10 minutes then roll flat either by hand or preferably with a pasta roller :)

Flatten until it’s as thin as a penny.

Then place spoonfuls of filling on one side of pasta, fold in half and press around seams to encase filling.
Cut between raviolis with pizza cutter or knife and press edges together with a fork.
Cover raviolis with flour to keep them from sticking to one another.
Cook in boiling water for 5-10 minutes, until raviolis float.


Drain water and add sauce.


I have to say, as much work as it was; these are the best raviolis I’ve ever eaten!   Such a simple and versatile recipe too, I will be making these again.


Printable recipe here.

Saturday, February 23, 2013

Radish Butter Toast


Radishes are so easy to grow, and they ripen in 25 days or so!  Plus one seed produces hundreds of seeds if you allow the plant to flower and form pods.   So once you start growing your own radishes you will never need to buy seed again… or radishes. 

 
I’m often caught with a bunch of ripe radishes ready to go so I’m always looking for new radish recipes and I kept seeing variations on this recipe.  Apparently this idea originated in France, a perfect topping for baguettes.   And since I had a bed full of over ripe radishes, I had to do something fast.  I went for the Martha Stewart version.  A lot of times people just slice the radishes,  but since my radishes  were in the ground a little too long I had to cut off some rotten/hard  sections , so grating them sounded like a better option this time. 

 
This recipe is so simple; you don’t really need exact measurements.  Basically just smash grated radish together with room temperature butter.

 
I lightly toasted my baguette, made using this recipe.

Then spread the radish butter mixture on the warm toast, slice and serve.

I took these as an appetizer to a family dinner and we devoured them.  I will definitely use this recipe again.  Spring is almost here, so next time I will be able to use fresh radishes!

Tuesday, February 5, 2013

Brewing Beer

This Christmas my Dad and stepmom set me up with a complete beer making kit.  I thought about asking for one for Christmas but never did, they know me too well!  I had an American pale ale recipe for my first brew.  The kit had everything I would need already measured out, so it was a good way to start brewing. 

I’m just going to go over the basics to give you an idea of the process, because basically I just followed the recipe in my kit.  It was relatively simple and very rewarding! 

Cooking the Beer

First I poured the grain into a muslin bag and tied it shut, dropping it into 2 gallons of water.  Heat to 150°F, then reduce heat and let simmer for 30 minutes, draining grain bag occasionally to let all the flavors seep out.


Remove grain bag, bring to a boil then remove pot from heat and stir in malt extract syrup. 


Next add the hops, hops are added at different stages of the brew for different flavors. 

The first hops added are for bitterness, and then the beer is boiled for 45 minutes.

The next hops for flavoring, and boil another 15 minutes.

Another batch of hops is added for aroma, the heat is turned off and the brew sits for 10 minutes.

Remove hop bag and sit pot in sink filled with cold water until it cools to 100°F

 
Fermentation
 
Siphon or pour brew into primary fermenter and add yeast stirring to aerate mixture.


Cover fermenter and put out of direct sunlight and ideally between 65° and 75° F.

 
Within the next day the beer should foam up.
 
After 5 days I added more hops for a dry flavor.


In 6-8 days the foam should disappear, which means the fermenting is done


At this point I transferred my beer into my secondary fermenter (although a secondary fermenter isn’t necessary for lighter beers, it does make the beer more pure by not giving the yeast residue time to taint the flavor. Plus I wanted to learn how to use all my equipment.)


After 12-16 days the beer should be ready to bottle.  A hydrometer reading is taken to be sure fermentation is complete.  Apparently bottles can explode if fermentation is not complete!

Bottling

Bottling was easy. I siphoned the beer into a priming container with a spout.

 
Stirred in fermenting sugar, which is what creates carbonation, when the remaining yeast eats the sugar.

 Then siphoned the beer into bottles and capped them with a double lever capper.

 
Pale Ales are good to go 2 weeks after bottling, but best after 3 weeks. 

Sunday, January 27, 2013

Veggie Enchiladas

I love this style of enchilada, with a cream of mushroom base.  My step mom would make them from time to time and the family would devour them!  And you can easily substitute other veggies to stuff the enchiladas depending on the season.

Start by making a cream of mushroom soup
½ pound mushrooms, diced
1 small red onion, diced
3 cloves garlic, finely chopped
2 TBSP vegan butter
1 ½ CUP veggie broth
Sautee mushrooms, onion, garlic in vegan butter until onions are soft and translucent.
Add veggie broth, cover and simmer for 30 minutes

Add:

1 TBSP flour
1 CUP vegan sour cream
½ CUP almond / rice / soy milk
1 can diced green chiles (4 – 7 oz can depending on taste)
Salt, Pepper to taste
Simmer uncovered for 10 minutes
Set aside ¾ of the sauce, to remaining ¼ of sauce add:
½ zucchini, cut in strips
1 carrot, cut in strips
4 or 5 mushrooms cut in strips
1 CUP corn
1 Cup Beans
Continue simmering for another 5 minutes, then stir in chopped green onion and cilantro to taste


Stuff 10 tortillas with veggie mix


Add another ½ CUP milk to sauce that was set aside and pour over stuffed tortillas


Bake at 350° F for 30- 35 minutes, or until bubbly


Friday, December 28, 2012

Xmas Presents

For the past several years I have made all my Christmas presents.  There are so many reasons to make things yourself around the holidays.  A handmade gift means a lot to loved ones and helps keep us away from all the over consumerism associated with Christmas these days.


Throughout December I’ve been posting what I’ve been making, but I’d like to compile everything here to give you all some ideas of easy, affordable home made gifts.


Simple knit skirts

These are for my Mom.  I used a skirt that I made her years ago for my pattern, which I believe was made with Simplicity pattern #4604 plus an elastic wasitband


Bay Rum Aftershave and Soap
 
Smells amazing!  I made these for my Dad, brothers, boyfriend, and male friends. (recipe here)


Reusable Muslin Tea Bags and Homegrown Hyssop Tea


My first batch of tea from the garden!  These are for my step-mom, and a couple other tea drinkers in my life.  I found a nice tin container to store the empty tea bags and made tags with a picture of hyssop and explanation of all its medicinal benefits.  Hyssop is an amazing herb! (tutorial here)


Leggings
 
For my sisters and lady friends (although I probably could have made these for everyone, since boys wear leggings too!) I’ve wanted to make try McCall’s pattern #6173 for a while!  It was super simple and they turned out great.  Never buying leggings again!


Printed Sweatshirt

For my 12 year old brother, who is too young to shave or care about soap, I printed a chicken skeleton on the back of a thrift store sweatshirt.  My brother takes care of the chickens and other birds at my dad’s farm, so I think he will be into this print as much as I am!

I made a silk screen (you can always make a stencil if you don’t have the equipment) and printed on a scrap of a t-shirt, then cut the patch out and sewed it on a hoodie.


Revenge Bot
 
OK, so maybe this isn’t one you could make easily.  We have a Christmas exchange on my Dad’s side of the family and I had my cousin who recently started his own skateboard company, Revenge.  So I made him one my robots with his logo on a robo-skateboard and the chest plate. Worked out perfectly!


Last year I made everyone food related items; hot sauce, soup, bread, fudge, chocolate covered cherries, peppermint bark, and even dog treats/catnip toys for pets.  I still wanted to make a few sweets this year and just take them to celebrations.  This is what I took….


Chocolate Covered Cherries (recipe here)


Homemade Pretzels Dipped in Chocolate
 

I used this recipe here and then melted vegan chocolate chips.

I dipped some in chocolate and crushed candy canes; others were covered in peanut butter, and then dipped in chocolate.


Skittles Vodka


I found this recipe here.  Tastes great, so glad Skittles is now gelatin-free!


And if you don’t have the time or energy for a diy Xmas, you can always shop locally and buy fair trade goods online.  My boyfriend has wanted a backstrap loom for a while; I found a really nice one here from a fair trade non-profit in Guatemala.

I made him this actual backstrap to go with it!

Sunday, December 9, 2012

Chocolate Covered Cherries


I love chocolate covered cherries!  And they make a simple, cheap gift that most people can enjoy. Apparently they taste better after a couple weeks, so this year I actually made them ahead of time.  They are amazing fresh too, but the additional time allows the cherry juices to soak into the candy giving it that sweet, juicy center.  Either way, chocolate covered cherries have quickly become one of my favorite things to make around the holidays.

INGREDIENTS:
60 maraschino cherries (with or without stems, stems just make them easier to dip and handle)
3 TBSP butter substitute, softened
3 TBSP corn syrup
2 CUP confectioner sugar
1 bag chocolate chips


Drain the cherries (save the juice for mixed drinks or other desserts later!).  Let the cherries dry on paper towels or in a colander.


Combine the butter and corn syrup until smooth.


Add the confection sugar and form into dough. 


Chill if necessary to keep dough firm.

Coat each cherry with the sugar dough, using about a teaspoon of dough per cherry.  I usually flatten the dough into a disk, wrap it around the cherry, and then roll the dough around the palm of my hand until the cherry is evenly coated.  (It doesn’t have to be perfect :)


Let chill until firm.


Melt the chocolate chips in a double boiler, or microwave.  Dip each cherry in the chocolate and coat.  Let dry on wax lined paper and store in an air tight container.

Sunday, November 25, 2012

Dad’s B-Day Gift – Crushed Red Pepper Flakes and Seeded Rye Crackers


For my Dad’s birthday this year I put together a jar of my homegrown crushed cayenne peppers and these seeded rye crackers with amaranth, sunflower seeds and fennel from the garden. 


My dad like’s spicy food, so I figured he could get some use out of my peppers!  Here is my post about drying the peppers, and then I simply crushed the dried peppers up a mortar and pestle until they were nothing more than seeds and pepper flakes.  So good!


This was my first time making crackers.  I didn’t have much wheat flour left, but I had a whole thing of rye flour.  I followed this recipe as my base and added seeds and more rye flour.  My adjusted recipe goes as follows:

½ CUP plus 2 TBSP rice milk
3 TBSP olive oil
1 CUP whole wheat flour
1 CUP rye flour
½ TSP baking powder
1 TSP garlic salt
2 TSP amaranth seeds
¼ CUP sunflower seeds
1 TBSP fennel seeds

 
Mix the milk and oil together.

Add the rest of the ingredients and mix until dough is formed.

Roll out on a floured surface and cut into cracker shapes (either into squares or use a cookie cutter).  I flattened the dough to about 1 cm, but you could make thicker crackers too, just cook a little longer.


Place the crackers on parchment paper lined baking sheets and cook for 18 minutes at 350°F, rotating about half way through.


They taste great!  My dad will love them.  I put my goods in glass jars and made a couple personal labels using sticker paper and permanent markers.


(I grew Joe's Long Cayenne Pepper's; I crossed the "E" in Joe's out and put a "Y" above to spell my name, Joy :) )